Thursday, 21 October 2010

Adjusted nose and mouth again, created eyebrows and a briefly reviewed.

I have adjusted my nose and mouth again, make it smaller.
The eyebrows created in same ways that create eyelash and hair.

Summary
The head model seemed very like me at first blush. Of course, the progression of modeling had been refined again and again.

Wednesday, 20 October 2010

Completed. look like me?~

It look like me~?

PS: Due to see my hair clearly, I have changed the background color to gray of render.

Monday, 18 October 2010

My eyelash and hair

Eyelash
Selected line at the edge of the eyelid, click ‘Create Sharp from Selection’. Click it and chose Freeze unselection. Hold Shift to copy the line according the eyelash sharp.
Then attach that and adjusted the vertexes.
After that, divide the line and chose the Spline, used the ‘Cross Section’ to link these lines, then deleted.

Right click and chose ‘Smooth’ to make it look better.
The next works is Detach these Splines, and attached that sequential order. The sequence is most impotent.
Selected the ‘Hair and Fun’ from modifier list. Set the Root color is black, Tip color is dark gray. Finally, modify other parameters to refine the eyelash, as the count, rand scale and thick.

Hair
Hair created in same way that create eyelash.

Friday, 15 October 2010

Eyeball created and UV mapping

Eyeball Created

Firstly, I have dragged a sphere on front view, hold on Shift and scale to copy small one. Tick the soft select and select the vertex in the top, move upward. Then, selected the small one, through circular selection region to select polygon in the top, detach and move the pivot to center to object, rotate 180 degree and make align. Then chose the Nomal from Modifer list. Drag the sphere with AutoGrid, and sunk down it.


Secondly, I have edited the material to eyeball. The eye white included transparent material and white material. The transparent need adjust the Specular Highlights and set Reflect/Refract on the Reflection. The iris has a glass texture map for color. The color I chose the brown and set the diffuse color to smaller. The Specular set wide highlight but not a sharp. And then, I have adjusted the texture UV angle. The Pupil had adjusted the Specular level and goodness.
Finally, grouped these parts, hold Shift to copy another one and mirrored.


UV Mapping

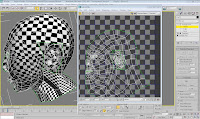
In this stage, I have expanded the UV three times. Obviously, I make getting better and better.
This is first Mapping

This is Second times 

The last Mapping

In fact, I have adjusted the model before mapping ever time. And now, my head model looks better. After that, I have mirrored and welded.

Then, I opened the UV in Photoshop. Follow the video, I have pasted my face according the UV. About the skin texture, I made the new layer to paint the color of ‘Blanched Almond’, set the opacity to 60% and chose the dissolve from Blend model. And then, create the new layer and print similar color merge layer with upon one. I think the color dark than my face, I create transparent layer and merge it.

Saturday, 9 October 2010

My head have been done except Mapping

My ear!!
There are lots of troubles when I created my ear.
Firstly, I have made the face inside-out.

I tried the ‘Normal’ tool, but it really not good.
So I must make my ear again. It need more careful with adjust vertex.

Make my head
Next, I have make the ear and back of head to together.

My Head is Complete!!
I have smooth and adjust some vertex.
I have made the eyeball~ But it look like....uh....... in a word, I am prettier than in the model!!!


Actually, I have tried to mapping my head, but it really difficult.
The first time was failed. I am doing again…

Thursday, 30 September 2010

Group Established

We established a group for make the 3d animation to presenting ‘My Essex’.
Our group consists of Tracy, Christina, Andrew and me.
We have discuss the theme of the animation, I have two ideas, one is intro the different festivities on the different place, another is present four seasons on different place.
Another raised the idea as show the different place through the ages, and used voiceovers to intro Essex.
We need to carry on the discussion next class and make a decision of idea.

After class, I have searched some image about Essex.

Tuesday, 28 September 2010

Tutorial 4,5,6,7 have been done


Follow the tutorial video, I have drew the lines on the front view. And then, chose one closed frame turn to poly and attach the all others. But now, a new problem has arisen on the outer piece that I made the triangle due to I just pay attention to the shape of face. I must do it again from drew the lines.


Next I click and drag all of vertexes, click wild setting and adjust the ‘Weld Threshold’ to wild vertex. Then, I modified the face through move vertex. To avoid triangle arise again, I have to do it very carefully.
After that, I have change the left view to right view and made the face shape. There is skill to make the process easier: Click control and X key to make the model translucent.

Adjust vertex according to the angle of face is most important, especially upper lip, corner of the eye and cheek.


The tutorial video intro three ways to make mirror, It is respectively Mirror, Clone and Symmetry. I chose the last one. But I make a little different, I chose Hierarchy plan and click ‘Affect pivot only’ to move the Y-axis to align the axle wire of my face. After that, I added Symmetry Modifier from modifier list.

My nose

I have watched the video many times to create my nose. It is really difficult for me. I think the nose’s line not clear is the most important cause of the trouble of make nose. I had to remove this part’s lines and create again. I completed the nose follow the video.

Back of the my head
Firstly, I opened my photograph on Photoshop and drew the line from back of head to neck.

Opened 3ds Max and drug a plane, used the same way to mapping the image and freeze it.
Secondly, drag a sphere according to my face size on front view. And then, I learned a new skill that ‘Paint Selection Region’. I selected the polygon around my head on the sphere and click delete. Move the vertex align to face. In the process, soft selection was used.
Then I adjusted the vertex according head shape and neck. The angle still is point. And the method same as before made face.

After that, I cut lines to refine the head and weld to face.

My mouth

Created my mouth used same way as nose, and adjusted to mouth shape. I think corners of the mouth need attention to the angle between the nose.

Sunday, 26 September 2010

Tutorial Video 1,2,3 have been done

Firstly, I opened the photograph with Photoshop. I used the ‘Lens Correction’ to straighten the image horizontally and pincushion distortions that my face. I chose straighten button, and dragged a horizontal line across my eyes, mouth, etc… Adjust to make my face look balance.
Move the sliders to the left or right to adjust my face to make them symmetrical when I click Remove distortion tool.
And now, I know the sliders move to the left to correct barrel distortion, move to the right to correct pincushion. The straighten can be make balance of image.


Secondly, I put the photos in the same layer, and then, I used ‘Rule’ tool tried to make the two images have same size and adjusting or aligning the nose, mouth and eye. I have to say ‘Rule’ is very useful tool.


Next, I drew lines on the feature in my face according facial muscle used blue.

This is key step. Around eyes, eyebrows, nose, tip of nose, cheek bone. The cheek bone needs a lot of control as it gives definition to whole face. Also make sure that drew in the indentation under cheek bone and nasal folds.


And then I drew red lines, more problems has arisen with triangle's area. Insure on just have quads is very important that created later. I had to do it many times due to I always made too many mistakes. Especially make eye and nose and side of nostrils that must set of small quads. In addition, I need make sure the line extends to the around cheek and eyes when I drew the cheek and nose.
To sum this process, I think two point need to attention. One is avoid triangle made, another is the line’s trend drew must accord with distribution of muscle.

In this way, I drew the lines on the side and ear.

Open 3ds Max and drug a plane, chose UVW mapping tool from modifier list. Opened the psd. final file follow chose fit bitmap tool. Adjusted the mapping and freeze that. And now, remember tick ‘Freeze’ option in the interactivity plan from ‘Object properties’.
In this step, I know adjust color be displayed ahead or aback from Material Editor.
Moreover, after I look the image that is very unclearly, especially the lines. I have google the problem, I know through change download texture size to 512 in the configure driver from ‘preference settings’ can made it clearly.

Thursday, 23 September 2010

Before I starting

This semester I will make the model of my own head. Before that, I have tried made the head-mold by different way that creat a BOX and modify continuously.
But in this course, I will learn to do it in a new way. Fristly, I have watched the introduction on the screen.  Frankly, It surprised me that method of create head model. It seems easier than ever.
And then, I have been given the photos of my head.
                  
                       Front                                                                              Side


Finally I have been download the tutorial videos.